Sunday, November 24, 2013

Party-Man

Can rock a party like nobody can.

So long have I waited for this day. So long! And now I have it. Still needs suspender buttons but I'll get those on when I have the suspenders with it.


Took quite a while to put these together, I was going off of vintage patterns for tuxedo pants that were in French and assumed that the person sewing knew enough about sewing that it left out any instructions and things like the waistband, fly, pockets, and lining (all of which I added to the final pants). So, learning as I went. Again.


Lining on the inside were left-overs of the Joker Mob tie I made awhile back. I can't tell you what a happy little mistake these were. I just didn't want to throw them away, so I put them in the pants. As a result, not only do they make the front pleats lay straight but they. Feel. So. DAMN. GOOD!

Need the shirt, shoes, waistcoat, and jacket now and I'm good to go. Not like I'll ever wear them but just to say I have them is what is important.

Thursday, November 14, 2013

Leatherface'd My Face ('74 Style)

I've always wanted a good Leatherface mask. I've known for ages what it was made of an how it was put together but I never bothered to do it.

Well, last night, I bothered to do it and I wanted it done the way the original one was done: with liquid latex and fiberglass insulation. I had spent about a week going around town gathering the supplies I needed (the only thing I had was the insulation) and was just waiting for the alginate (for face-molding) supplies to ship in.

Now, I only had enough supplies to support one cast and I had attempted three times previously to make a life cast of myself, by myself, with very poor results. Fucking this up was not an option for me and I had to work with whatever I produced.

This was the final result.
 Decent, but I still kinda fucked it up. The way I set it down to cure and the weight  of the thing caused the nose to be squished flatter than what it was. In the picture, you can clearly make out where I had to fix the bits with Super Sculpey over the gypsum (it's like a cross of plaster and cement) lifecast. There were also quite a few holes in the mold, something I can't seem to ever compensate for, so this cast had a few lumps that I had to chip and sand away.

Skip a few hours later of laying on the fiberglass insulation and latex and you get this picture.
The face was fully laid up and to get enough for the back of the mask, as I was running out of latex at this point (4 fl. oz is definitely not enough if I do this again), I laid out what latex I could spare on the tablemat/cutting board I put together and laid out thin layers of the insulation on top of that. I covered the thing with as much latex as I could before I ran out and had to use Modge Podge for some areas.


Skip even a few more hours of me fiddling around and burning myself with hot glue, and I got this:

 About 6-7 hours worth of work and I kind of hate it. I was really wanting it to come out smooth (at least, smoother) like the original mask but I honestly couldn't get the fiberglass from clumping as I was laying on the latex. Having said that, I think it was because I was using thin strips instead of a larger sheet and too much of both latex and fiberglass. The stretched, wrinkly texture gives the mask an interesting look, I'll give it that, but it just isn't right: it's far too lumpy looking for it to be genuine.

The latex I had bought, it was from a small costume shop in the next town over, and all they had was this pink, flesh-y colored stuff (and after having made the godamn trip), I went and bought it anyway; hoping it would dry to that parchment-yellow that latex does. 

It sort of did.

You can see in the photos where some of it still stayed a bit pink. Again, it adds a nice touch but, like I said, it's not right.

Other inaccuracies are the position of the scalp, it ought to be brought farther down on the face; the mouth, I fudged that up by cutting it crooked by mistake and opted to hot-glue the wire in (instead of sewing it in, which I only noticed after the fact); the eyelets are not on the neck as I opted to keep them off to save on precious, precious money from being spent.

For the most part, I'm glad that I was able to pull this off, I set out to do it and I "did it" for the most part. Overall, though, I'm fairly disappointed in it: it just didn't turn out the way I wanted. Instead, this is just gonna be another case of me going out to do something that I had my heart set in, have it turn out a way I wasn't aiming for, but too stubborn to chuck away. 

I'd love to do this again and apply what I learned from this over onto that to make something better looking, but as it is, me being extremely strapped for cash until I can find a way to make some money (barring having to go back slaving away in an office or the "service industry" and getting stuck) with the skills I possess: this'll have to go on the back-burner. It'd be pointless for me to invest in more supplies in an attempt to make another one to just stick on my shelf.

In other news: starving artist looking for work and commissions! BUY SHIT FROM ME!

Thursday, November 7, 2013

Some Quick Builds: A Scarecrow and Some Books

I had some more burlap fabric (thinking about bookbinding) than I had anticipated, so I decided to do something with it.

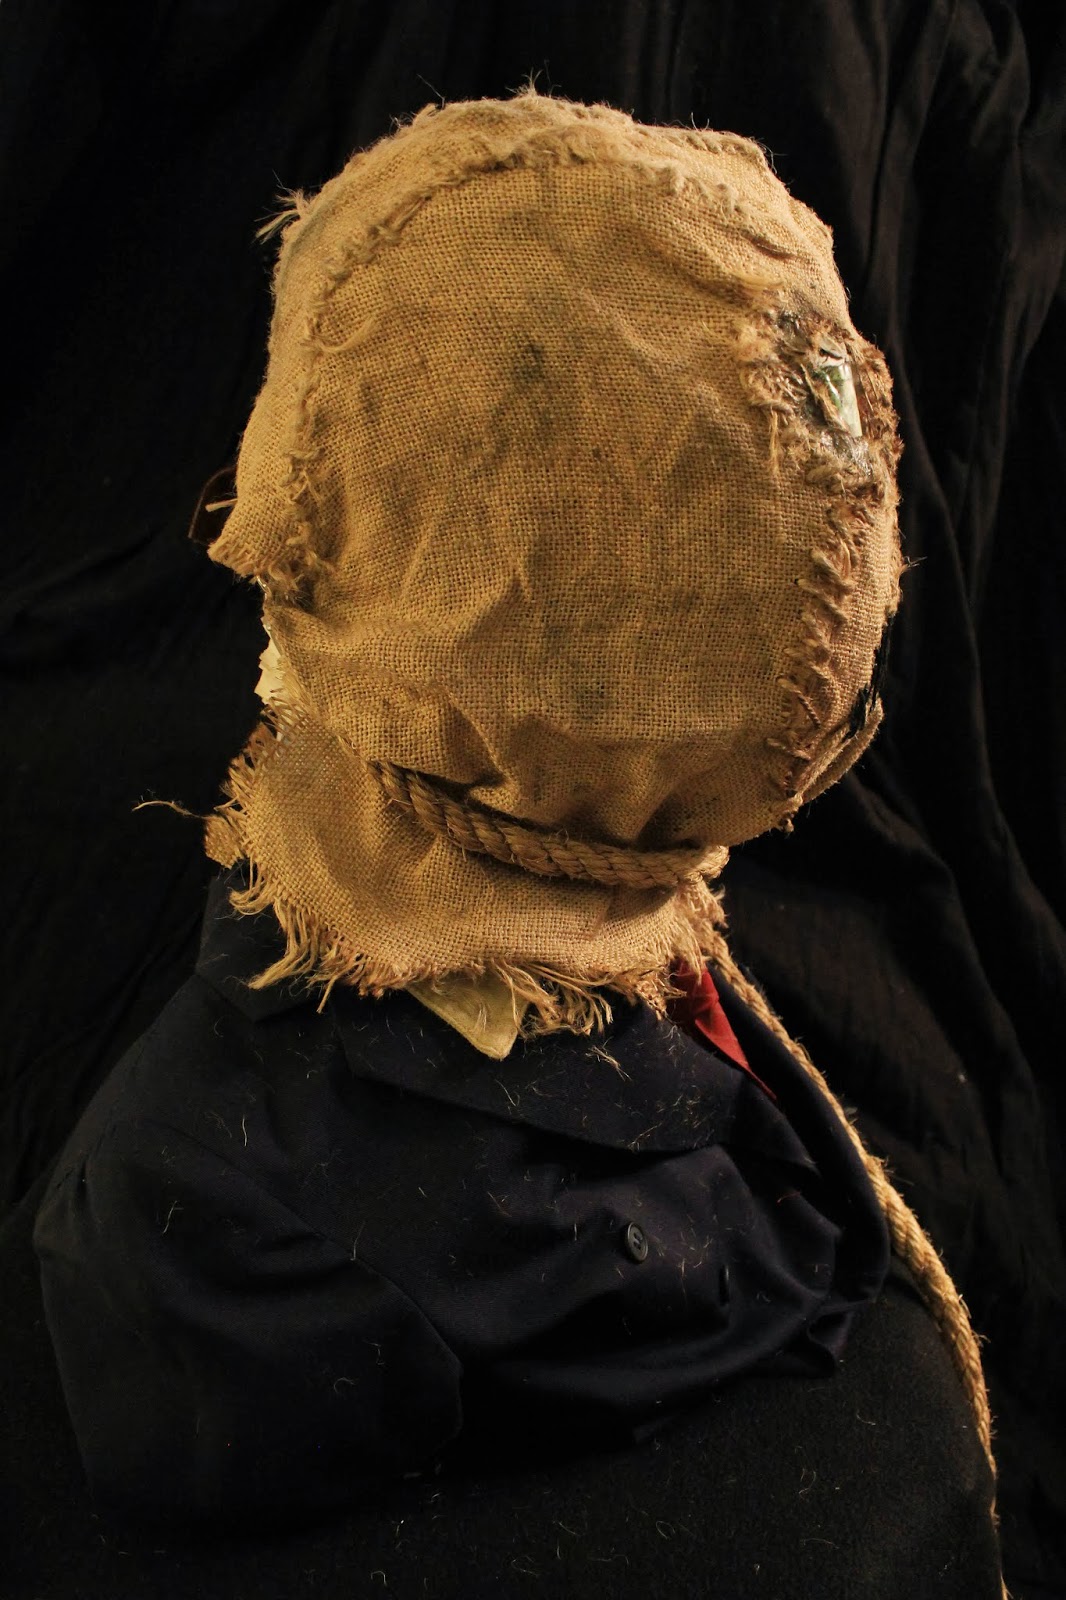
Why not Scarecrow from Batman Begins?

Stitched and put together on Tuesday, distressed it Wednesday, took photos this morning (Thursday) after some more touch-ups. 

The only things I bought were the hemp rope to stitch the thing together with and the d-rings in the back; everything else I made with stuff on hand, by hand. The noose rope is a bit thicker than the original but, again, this was made with whatever I had laying around.

Took a total of 5-6 hours worth of work in all.


Before that, I had some left-over paper from the Skyrim CD Case/Book thing I did. Not wanting to throw it away, I turned it into some books. They'll be up on my Etsy shortly, they won't go for much, but I just want to get rid of the things.


Clearly, the green one is based off of the journal Indy has in Raiders when he's in the Well of Souls and the blue one is just one I made in the vein of the previous one. They're all beaten and battered to hell because when I was putting them together, I did it kinda quickly, therefore: sloppy. So, in order to create some continuity in the overall look, I just beat the hell out of them.

S'fuckin' easy.

Thursday, October 31, 2013

Happy Halloweens!


Besides, these "punkins," I also did a commission for a couple this season for their baby boy, Darius. The costume was a cute-sified Zergling from the Starcraft games. Unfortunately, I didn't get a chance to take many pictures during or after it was completed.

This was the concept pic I threw together:

...And this is the only pic I have of it from when I was modifying the claws on the back. Hopefully, I'll get some pics of  the finished thing on the kid soon. The couple seemed very pleased with it and so was I, considering most of it was hand-sewn.


Monday, September 9, 2013

To Honor the Hebrew God Whose Ark This Is...

Finished, finally! After a weeks worth of abysmal failures in trying to cast the center jewel piece (for future reference, stay away from shit sold at hobby/craft stores: i.e. Castin' Crafts and Easy Cast Epoxy. These things suck). It was only recently that the two jewels that I cast in epoxy resin came out decent enough to work with. By decent, I mean cured to a semi-hard density and isn't tacky. Remember, folks, you get what you pay for; if you buy cheap, you get cheap.

Anyway, weathered and sealed the thing up to last forever and ever.

Pictures!


 Despite the unexpected amount of trouble I had with building this thing, this is easily up there as one of my most favorite things.


Thursday, September 5, 2013

An Explorer's Guide

...To Skyrim!

...The book!

...CD Case!


Just something I've been thinking about doing for a while (well, ever since I received an extra copy of the soundtrack). The book is completely hand made. The paper was had cut, hand sewn, and all hand bound in hand made book cloth.

Then hand aged and left out for days for it dry fully. Tips for the future: for aging books, do it all before you assemble it. Otherwise, it'll all fall apart if you just dunk the whole thing, fully assembled, into a bin of tea.

Hoping to get rid of this on the Etsy, soon.


EDIT: Now up on the Etsy.

Monday, September 2, 2013

Minus One Kadam...

So, I skipped some boring bits and jumped to the good stuff: both sides were sculpted, molded and casted. The picture below are the raw casts ready for trimming and cleaning.

Skip some more boring stuff about gluing, cleaning, trimming bits and onto partial assembly.
The chain that wraps around the headpiece is from an old gold necklace I never wore, but just had around. Using my trusty ol' Zap-A-Gap, the thing stuck on fairly well to the plastic.

"Front"

"Back"

The castings came out pretty well, but due to the humidity here (I try to do these things outside when I can) coupled with how old my resin has gotten, the "front" side had a lot more air bubbles than I had thought.


I think it was also due to the fact that this side was a lot finer detailed than the other, making all these pockets of air that got trapped in the silicone. Either way, with some paint, I think it'll be okay. The only thing that it needs now are some crystals in the center and it's good to go on the shelf.

I've yet to work with the clear resin that I'm using for the crystals before, so that'll definitely be another learning experience, I'm sure.